
The Exposure Triangle: From Rule to Personal Style
Discover the creative effects achievable when mastering the exposure triangle. This article concludes a four-part series where aperture, shutter speed, and ISO were explored individually.
Alberto Cano
11/20/2025
We’ve arrived at the sweet spot, the crème de la crème, as they say—whether or not that’s the exact phrase doesn’t matter. What matters is that the three earlier posts were explored one by one, making the journey through the Exposure Triangle easier to follow.
So, what is the exposure triangle?
It’s simply the three main settings you adjust when taking a photo or recording video: ISO, shutter speed, and aperture. These three work together to control how your image looks.
Did you know....?
The word "photography" comes from Greek, from the roots φῶς (phōs, genitive φωτός phōtós), meaning "light," and γράφω (graphō), meaning "to write" or "to draw." Therefore, etymologically, photography means "to write with light" or "to draw with light."
So, to make a photo using light, you need three main settings. You can use each one separately, but the key is learning how to control all three at once. That’s how you create images that last over time—pretty exciting, right?
As we’ve seen in earlier posts, each adjustment leaves its own mark. At the start, it’s wise to learn the rules of the game—only then can you bend or break them with confidence, without losing control of your image.
Let’s look at a few examples to bring these ideas to life:

Focal length: 24 mm
Focal length: 92 mm
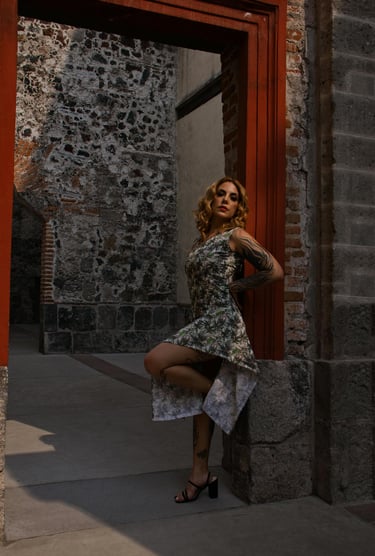
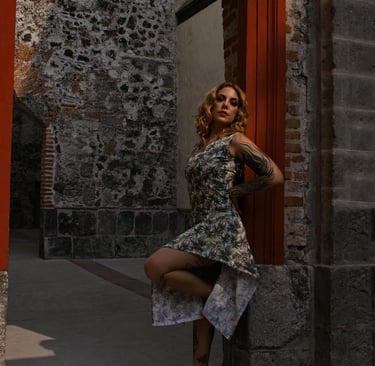
For example, while a 50 mm lens is a perfect basic choice for portraits, don’t be afraid to use longer or wider lenses as well. In this case, we can see two portraits: one taken at 92 mm, where getting closer and having less light entering meant we had to adjust shutter speed and ISO to compensate for the reduced aperture. In the second, a focal length of 24 mm was used, which allowed us to open the diaphragm more and rely less on ISO and shutter speed.


Focal length: 100 mm
Set
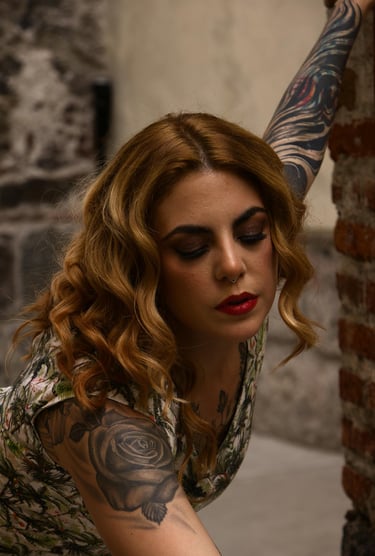
Another example: during the “Night of Experts” event at acmcine, the lead photographer encouraged me to move in closer with a 100 mm lens. The results were stunning. But the real question is—how did the exposure triangle come into play? In this case, I leaned on a flash, compensating for the lack of natural light to reach the same quality as the earlier shots.
Now, some examples of how the exposure triangle comes into play in videos:

Without a doubt, one of my favorite music videos. They play a lot with blur and the depth of field created precisely by the aperture, along with other elements such as flares, which I’ll talk about in future articles.
Don’t expect video to look perfect the first time you shoot it. Often, you need to think ahead about how you’ll edit it. For example, here the singer looked purple and fluorescent, so the lighting had to be adjusted to keep his features clear. And when he played basketball, the effect chosen was a freeze frame to show the ball’s movement clearly, instead of a blur effect

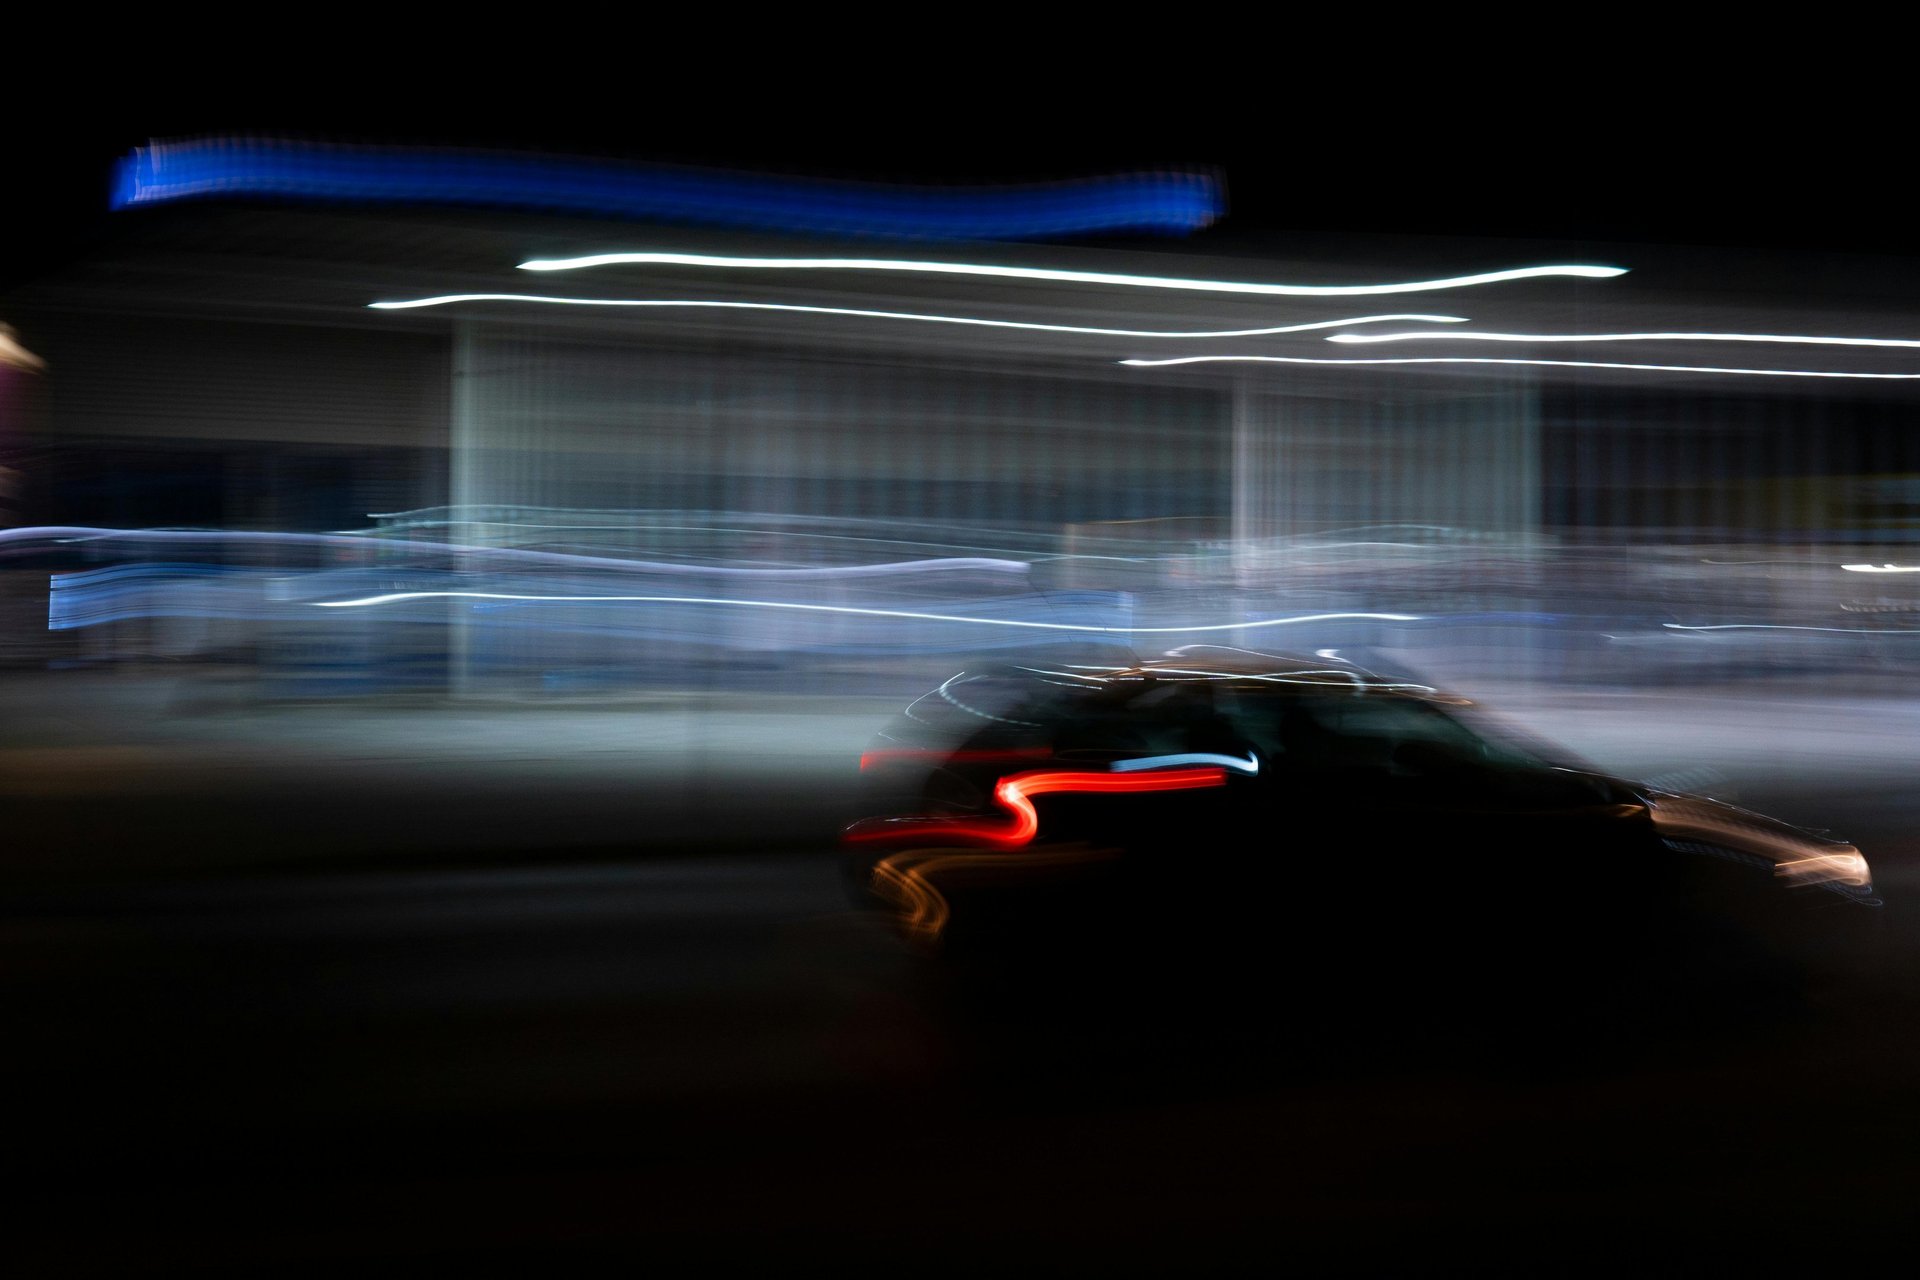
In this reel, the shutter speed is set very high (1/8000), with ISO 1600 and aperture 2.8. That fast shutter lets us see details clearly—like the wind moving the players’ shirts, the moment their feet hit the ball, and even the muscles of the athletes showing in the video.
Here are some common mistakes:
1.- Raising ISO too much to compensate for lack of light
• Result: photos with a lot of digital noise and loss of detail.
• Solution: first adjust aperture and shutter speed, and leave ISO as the last resort.
2.- Using extreme apertures without considering depth of field
• Typical error: opening the diaphragm too much to gain light and ending up with overly limited focus.
• Solution: think about the narrative effect you want (isolating the subject vs. showing context).
3.- Shutter speeds too slow without stabilization
• Result: blurry photos due to camera shake, even if exposure looks correct.
• Solution: use a tripod, stabilizer, or raise ISO/aperture to keep a safe speed.
4.- Chasing “perfect exposure” in-camera without thinking about post-production
• Error: obsessing over the ideal histogram and forgetting that a RAW exposed to the right can be more flexible in editing.
• Solution: expose with your workflow in mind.
5.- Not balancing the three parameters
• Common mistake: adjusting only one (e.g., opening the aperture more) without compensating the other two.
• Solution: remember it’s a triangle—every move requires a counterbalance.
In conclusion…
There are many techniques and styles. The important thing is to explore each of them and see how we can adapt them to our own style. Once we have enough knowledge about the rules of photography and composition, then—and only then—can we break a rule to communicate a different perspective or simply highlight our personal style.
Tips and tutorials for aspiring creators.
© 2025. All rights reserved.
TAGS: